
Using Fulfillment by Amazon can make processes of your online store easier, as the packing, labeling, and shipping will be taken care of, while you can focus on business growth.
Approximately 94% of sellers utilize FBA for seamless operations, making it a profitable choice for newcomers and seasoned individuals alike. Read on to learn more about using Amazon FBA to scale up your ecommerce venture.
Create the product listing
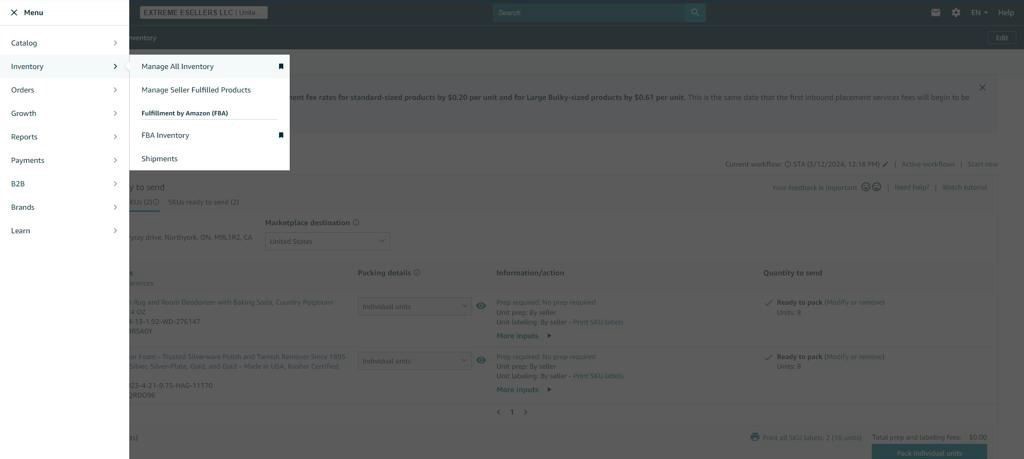
To create a shipping plan inside Seller Central, first, click on the three-bar menu, select ‘Inventory’, followed by ‘Manage Inventory’ from the drop-down menu.
To create a shipping plan inside Seller Central, first, click on the three-bar menu, select ‘Inventory’, followed by ‘Manage Inventory’ from the drop-down menu.
Select the product
You will be able to see the list of products on the ‘Manage Inventory’ Page. Choose the item you would like to dispatch to the Amazon Fulfillment Center.
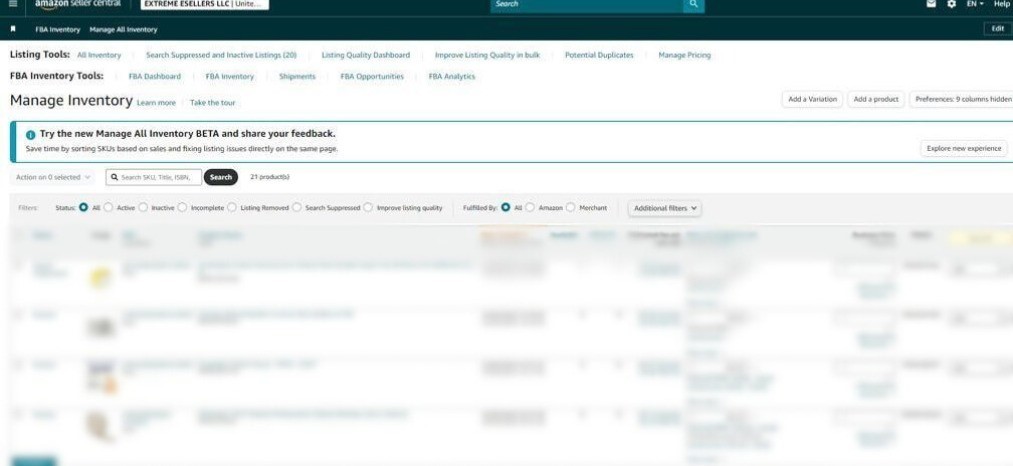
If you are not able to see the list of products, that could be because you haven’t added any. In this case, you need to add the products from the main menu before proceeding with the shipping process to the Amazon FBA.
Ensure you have selected Amazon FBA as your preferred option, rather than any other options listed. Then, click on the dropdown menu located in the right-hand corner and select ‘Send/Replenish Inventory’.
Enter your packing details
If you’ve previously set up a workflow for this product, it’ll be visible here. Otherwise, you’ll need to input new packaging information, such as the number of units per box, dimensions, and package weight. The exact packing details can be confirmed by consulting your supplier.
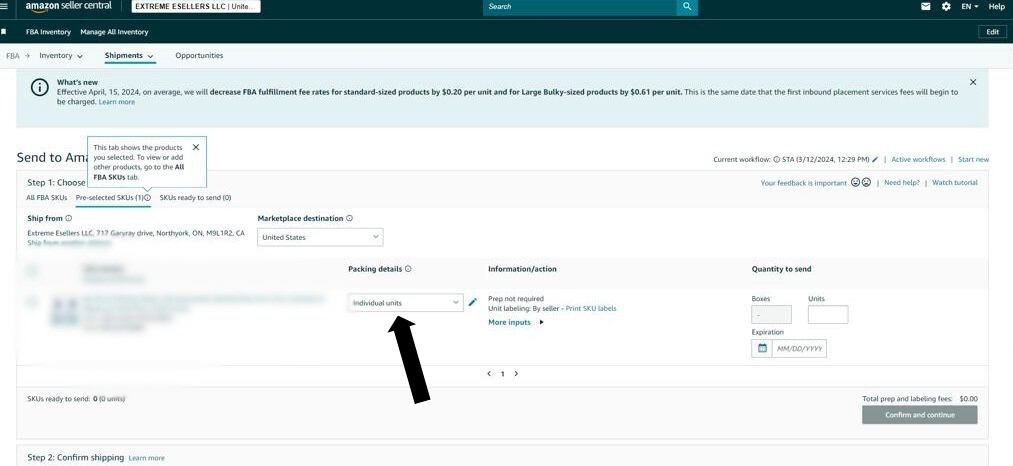
You can also change the address in the option located in the left-hand corner, showing where the items should be collected for delivery to the Amazon warehouse.
Choose Prep Category
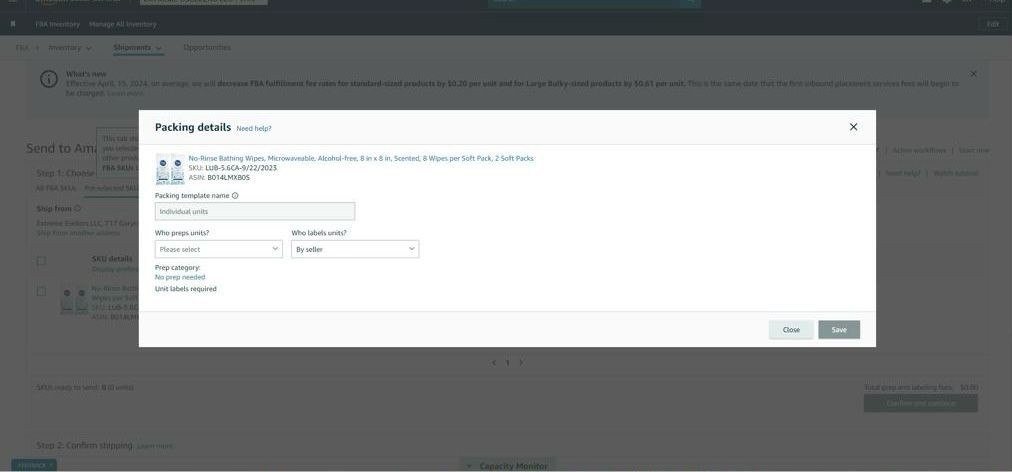
There is additional information on the page that needs to be filled. You can fill the Prep Category below the ‘Information/action’ tab, noting who will manage your shipping order.
If you need Amazon to take up the prep and labeling tasks, you can choose the appropriate option from the list. However, you will be required to pay Amazon FBA Prep and FBA Label Service Fee.
After clicking the save button, enter the number of units on the extreme right-hand side. This is where you will enter the total number of pieces that the supplier will deliver.

Confirm Shipping
Click on the button ‘Confirm and continue’, then on ‘Pack Individual Units.’ You will be navigated to the page and need to enter the right criteria for packing information that suits your shipping needs.

Leave the content information in the web form format so that changes can easily be made when needed. Double-check that the size and weight of the carton are correct. Next, you enter the estimated ship date and choose the option SPD (Small Parcel Delivery).
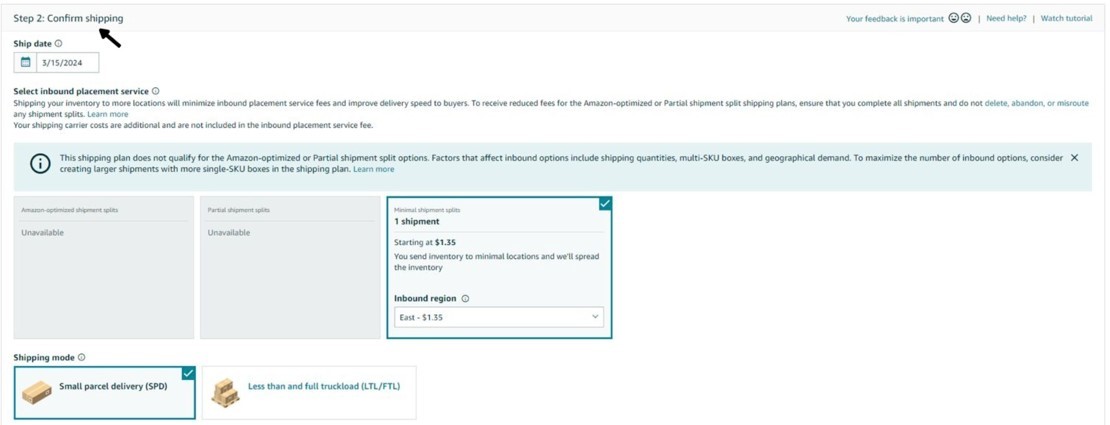
Select the ‘Amazon partnered carrier’ from the carrier selection box, and you will be able to see a price and get charged right away.

Track Inventory
Utilize FBA for Inventory Management to maintain product availability and reduce extended storage costs.
To manage inventory through Seller Central, navigate to the main menu, hover over ‘Inventory’, and select ‘FBA Inventory’. This platform allows for monitoring, planning, and restocking of inventory.
The second option where you can organize stock levels is the FBA Dashboard which gives details of your sales, stock, and delivery.
Overview
Enrolling your products in FBA offers an excellent opportunity for business growth, whether you are a newcomer Amazon seller or seeking ways to expand your ecommerce venture.
Sellers often prefer Amazon due to the reliability of the service, and the company’s reputation and goodwill. However, there may also be other options the third-party sellers may consider.
If you are considering using FBM or need guidance with the logistics management of your Amazon store, feel free to consult Unitedprep. We provide suitable offers and customized services to suit your shipping and delivery requirements.


